How to Set Up a Virtual Reality Lab: A Comprehensive Guide
Setting up a virtual reality lab can seem daunting, but with this comprehensive guide, you will be able to do it in no time! In this guide, we will walk you through the process of setting up your VR lab and getting it ready for use. We'll cover everything from choosing the right equipment to configuring your software. So whether you're a business owner looking to set up a VR lab for employees, or a student looking to create your own VR learning environment, this guide has you covered!
What is Virtual Reality?
Before we dive into how to set up a virtual reality lab, let's first take a step back and understand what virtual reality is. Virtual reality (VR) is a simulated experience that can be used for training, education, or entertainment purposes. VR allows users to immerse themselves in an artificial environment and interact with it in a realistic way.

There are two main types of VR systems: tethered and untethered. Tethered VR systems are connected to a computer or gaming console, while untethered VR systems are self-contained and typically use a mobile phone as the display device.
How to Set Up Your Virtual Reality Lab?
Now that you know the basics of virtual reality, let's get into the nitty-gritty of how to do it. Setting up your VR lab will involve five main steps:
Step 1: Choose the right place for your VR lab
The first step in setting up your VR lab is to choose the right location for it. You'll need to find a space that's large enough to accommodate all of your equipment and provide enough room for users to move around freely. The area should also have good lighting and ventilation. If you're setting up a VR lab for business purposes, you'll also want to make sure the space is private and has access to the internet.
Step 2: Choose the right equipment for your needs
The next step in setting up your virtual reality lab is to choose the right equipment for your needs. There are a few different things you'll need to consider when selecting VR equipment, including:
- The type of system you want (tethered or untethered)
- The display device you'll be using (e.g., a computer monitor, television, or virtual reality headset)
- The input devices you'll need (e.g., controllers, keyboards, or mice)
- The type of software you want to use (e.g., gaming, productivity, or design)
Once you've considered all of these factors, you can start shopping for VR equipment. When making your purchase decisions, be sure to read reviews and compare prices to get the best value for your money.
Step 3: Configure your software
After you've selected the VR system you'll be using, it's time to configure your software. This step will involve installing any necessary drivers and setting up your VR environment. The process will vary depending on the VR system you're using, so be sure to consult your user manual or manufacturer's website for specific instructions.
Step 4: Connect your hardware
Now it's time to connect your hardware and get everything up and running. This step will involve connecting your VR headset, controllers, and any other peripheral devices to your computer or gaming console. And the process will again vary depending on the VR system you're using.
Step 5: Test and troubleshoot your setup
Once you've connected all of your hardware and configured your software, it's time to test out your setup! Try running some of your favorite VR apps or games to make sure everything is working properly. If you run into any issues, don't hesitate to reach out to customer support for help troubleshooting your setup.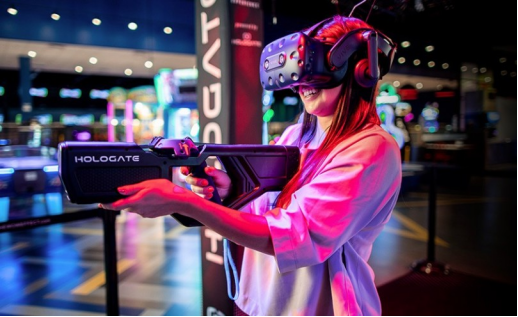
Conclusion
Now that you know how to set up a virtual reality lab, it's time to get started! Follow the steps outlined in this article to get your VR lab up and running in no time. And don't forget to have fun exploring the world of virtual reality!


